
How to Install a Door Jamb Frame
Samuel MorrisHow to Install a Door Jamb Frame: A Step-by-Step Guide
Installing a door jamb frame is a crucial step in fitting a door properly. A well-installed jamb ensures that the door functions smoothly, aligns correctly, and provides adequate support. Whether you're replacing an old jamb or installing a new one from scratch, this guide will take you through the entire process step by step, ensuring a professional and long-lasting installation.

Tools and Materials You'll Need
Before beginning the installation, gather all the necessary tools and materials to ensure a smooth process:
- Measuring tape
- Level (preferably a 4-foot level for accuracy)
- Circular saw or handsaw
- Hammer or nail gun
- Nails or screws (2 ½-inch screws recommended)
- Wood shims (thin wooden wedges for leveling and spacing)
- Drill and drill bits
- Screwdriver
- Wood glue (optional for added strength)
- Caulk and sealant (for finishing touches)
- Pencil or chalk for marking measurements
- Sandpaper or a sanding block
- Utility knife
- Clamps (optional for holding pieces in place)
-
Paint or stain (if finishing the jamb)
Step 1: Measure the Door Opening
Before cutting any wood, it is essential to measure the rough opening where the door jamb will be installed.

The rough opening should be slightly larger than the door itself to allow for adjustments and shimming. Typically, the opening should be:
- 2 inches wider than the actual door size (for the side jambs and shims)
- 1 inch taller than the actual door height (to allow space for the head jamb and flooring adjustments)
Use a measuring tape to take accurate measurements. If you’re replacing an existing door jamb, measure the current frame and check for any irregularities in the opening, such as warping or uneven walls.
Step 2: Cut the Door Jamb Pieces
A door jamb frame consists of three main pieces:
- Two vertical side jambs (also known as legs)
- One horizontal head jamb
Using your measurements, mark the wood and cut the jamb pieces with a circular saw or handsaw. Ensure that the edges are square and smooth for a precise fit. If using a power saw, wear protective gear and cut in a well-ventilated space.
Tip: If you’re installing a pre-hung door, the jamb may already be cut to size. Double-check the dimensions before proceeding.

Step 3: Prepare the Rough Opening
Before installing the jamb, inspect the rough opening for any issues:
- Ensure the opening is square by measuring diagonally from corner to corner. If the measurements are not equal, adjustments will be needed.
- Check that the floor is level where the door will sit.
- Remove any debris, nails, or old adhesive from previous installations.
- If necessary, add extra framing or a support board to reinforce the structure.

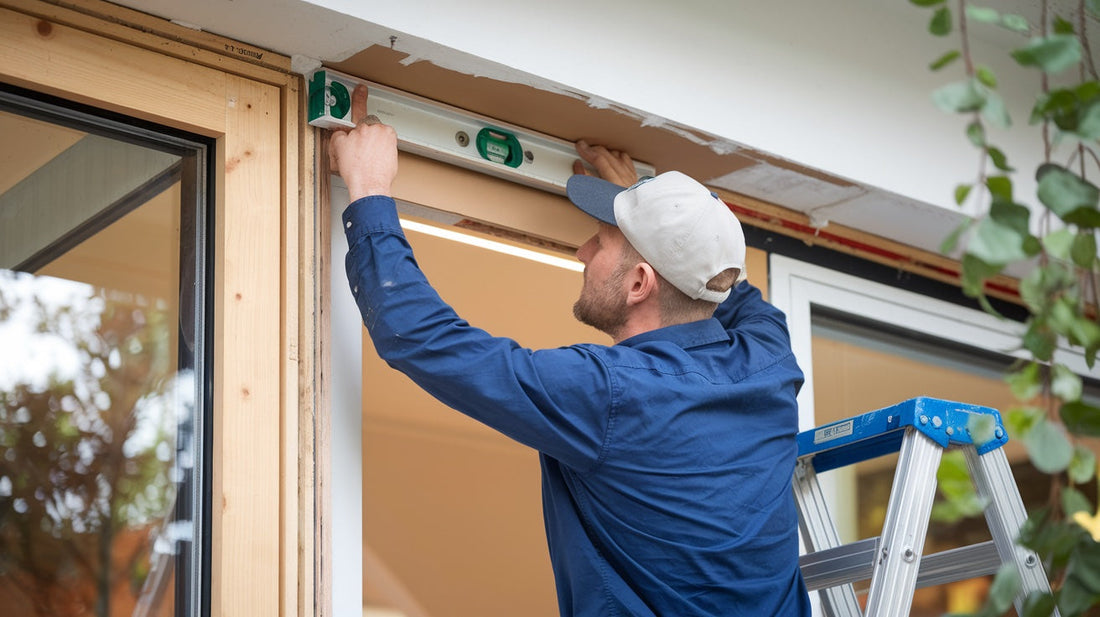
Step 4: Position the Side Jambs
Start by placing one of the vertical side jambs into the opening. Use a level to ensure it is perfectly straight (plumb). If the wall is uneven, use wood shims to adjust the jamb until it is aligned. Secure the jamb with nails or screws, ensuring it remains plumb.
Repeat the process for the second side jamb, ensuring both are evenly spaced and properly aligned. Use a temporary clamp or a helper to hold the jamb in place while fastening.

Step 5: Install the Head Jamb
Once the side jambs are secured, position the horizontal head jamb at the top of the opening. It should fit snugly between the vertical jambs. Before fastening, check that it is level. If adjustments are needed, insert shims to even out the placement.
Secure the head jamb with nails or screws, making sure it is firmly in place before proceeding.

Step 6: Secure the Jamb with Shims
To prevent shifting or warping over time, insert wood shims between the jamb and the rough opening. Place shims behind the hinges and lock points for added stability. Proper shimming ensures the door remains level and operates smoothly.
- Insert shims every 12 to 16 inches along the jamb.
- Adjust them carefully so that the jamb remains straight.
- Trim off any excess shim material with a utility knife or saw.
Step 7: Fasten the Jamb Securely
Once the jamb is properly positioned and shimmed, secure it in place with nails or screws. If using nails, drive them through the shims and into the wall framing. If using screws, countersink them slightly and fill the holes with wood putty for a clean finish.
Check the entire jamb to make sure it is firmly attached and does not shift when pressure is applied.
Step 8: Test Fit the Door
Before proceeding further, temporarily hang the door to check its alignment. Look for the following:
- The door swings freely without resistance.
- The gaps around the door are even (typically ⅛ inch clearance around the edges).
- The door latches correctly into the strike plate.
- The hinges are flush and properly secured.
If adjustments are needed, reposition shims or sand down uneven areas as required.
Step 9: Install the Door Stop Molding
Once the door jamb is fully secured and the door operates smoothly, install the door stop molding. This piece helps prevent the door from swinging too far and provides a clean, finished look.
- Position the stop molding evenly around the edges of the door frame.
- Use finishing nails or adhesive to attach it securely.
- Sand any rough edges and fill nail holes with wood putty for a seamless finish.

Step 10: Final Touches and Finishing
To complete the installation, follow these final steps:
- Apply caulk along the edges of the jamb to seal any gaps and prevent drafts.
- Paint or stain the door jamb as desired to match your decor.
- Check that all screws and nails are properly secured.
-
Clean up any sawdust or debris from the installation process.
Conclusion
Installing a door jamb frame is a fundamental step in ensuring a door functions smoothly and securely. While it requires precision and patience, following these detailed steps will help you achieve a professional-quality installation. A well-installed jamb enhances the durability and aesthetics of your door, providing long-term performance and reliability.
By taking your time, double-checking measurements, and making necessary adjustments along the way, you’ll create a sturdy and properly aligned door frame that will last for years to come.
Now that you've successfully installed your door jamb frame, you're ready to hang the door, attach hardware, and complete the finishing touches. Happy DIY-ing!