
Changing Interior Doors: A Step-by-Step Guide
Replacing an interior door is one of the simplest and most effective ways to enhance the look and functionality of your home.

Whether you’re aiming to modernize your interiors, repair a damaged door, or upgrade for better soundproofing and energy efficiency, replacing an interior door is a manageable project with transformative results. In this comprehensive guide, we’ll walk you through every step of the process, from preparation to finishing touches, while offering valuable tips to ensure a successful outcome.
Why Replace an Interior Door? - View Our Oak Collection
Interior doors contribute significantly to the overall design and usability of your home. Over time, wear and tear, outdated styles, or poor functionality can diminish their appeal. Replacing an interior door is an opportunity to address multiple issues. For instance, if your current door has visible dents, scratches, or cracks, it can detract from the room’s aesthetics. Older doors may also warp or sag, leading to issues with opening and closing.

In addition to addressing functionality, a door replacement allows you to update the look of your home. Modern door designs—such as panel, flush, or barn doors—can instantly elevate the style of a space. You can also improve privacy, soundproofing, and insulation by choosing the right materials, such as solid-core doors, which are more effective at reducing noise and providing thermal insulation compared to hollow-core options.
Replacing an interior door isn’t just about aesthetics or function; it’s also a long-term investment. High-quality interior doors can add value to your home, making it more appealing to potential buyers if you decide to sell in the future.
Getting Started: Tools and Materials - Click For Hardware Kits
Before you begin the project, it’s essential to gather all the tools and materials you’ll need.

Proper preparation will save time and prevent unnecessary delays. Here’s what you’ll need:
Tools:
- Screwdriver (manual or powered)
- Hammer
- Pry bar
- Measuring tape
- Level
- Saw (hand saw or circular saw)
- Chisel
- Drill with drill bits
- Sandpaper (various grits)
- Clamps
- Utility knife
- Materials:
New interior door (pre-hung or slab door)
- Hinges
- Screws
- Door hardware (knobs, handles, or locks)
- Wood filler (optional)
- Shims
- Paint, primer, or stain (optional)
- Weather stripping or door sweep (optional)
Ensuring that you have the right tools and materials on hand will make the process smoother and prevent unnecessary trips to the hardware store.
Step 1: Measuring for the Perfect Fit
Accurate measurements are the foundation of a successful door replacement project. Begin by measuring the existing door’s dimensions, including its height, width, and thickness. This information will help you select a door that fits the frame without significant modifications. Use a tape measure and record the measurements carefully.

Next, measure the door frame. Check the height and width of the frame’s opening to ensure it aligns with the new door’s size. Additionally, measure the locations of the hinges and the distance between them. Identifying whether the door swings inward or outward and whether it’s a left-hand or right-hand swing is also essential.
If you’re unsure about your measurements or want to avoid mistakes, consider bringing the old door with you to the hardware store. Most stores can help you match the new door’s dimensions with your existing frame.
Step 2: Choosing the Right Door
Selecting the right interior door involves more than just picking a design you like. You’ll need to decide between a pre-hung door and a slab door. Pre-hung doors come with a frame and hinges already attached, making them ideal for situations where the existing frame is damaged or needs replacement. Slab doors, on the other hand, are standalone doors without a frame. They’re a cost-effective option if your current frame is in good condition.

When choosing materials, consider the specific needs of the space. Solid wood doors are known for their durability, elegance, and natural appearance, but they can be expensive. Hollow-core doors are lightweight and affordable, making them a popular choice for interior spaces where soundproofing isn’t a priority. Solid-core doors strike a balance between the two, offering better soundproofing and durability at a reasonable price. For spaces like home offices or bedrooms, where noise reduction is crucial, solid-core doors are an excellent choice.
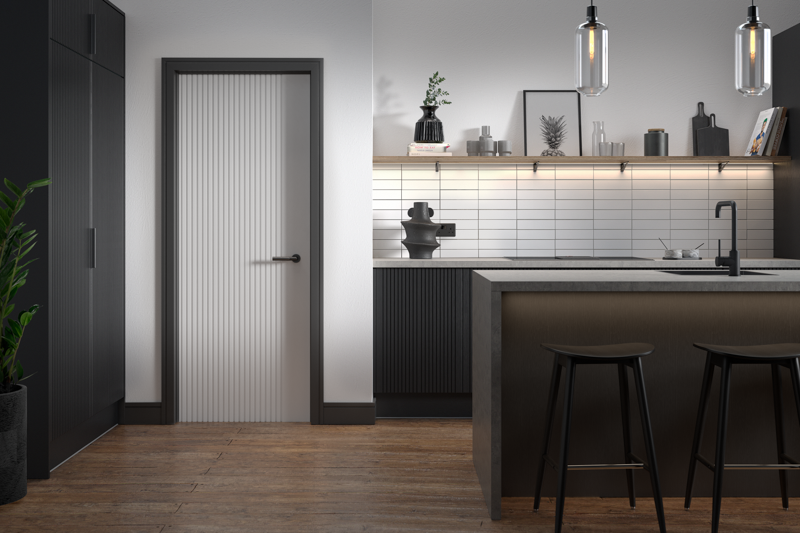
The style and finish of the door are equally important. Flush doors offer a clean, minimalist look, while panel doors add a touch of classic charm. Sliding barn doors are perfect for saving space and adding a rustic vibe, while French doors allow natural light to flow between rooms. Choose a finish that complements your home’s decor, whether it’s a natural wood stain, a sleek white paint, or a bold color to make a statement.
Step 3: Removing the Old Door
Removing the old door is a critical step in the replacement process. Start by unscrewing the hinges from the door frame using a screwdriver or drill. It’s best to begin with the bottom hinge and work your way up to prevent the door from falling unexpectedly. Once the hinges are detached, carefully lift the door out of the frame.

Inspect the frame for any signs of damage, such as cracks, warping, or loose screws. If the frame is in good condition, you can proceed with the installation. However, if you notice any issues, repair or replace the frame before installing the new door. A damaged frame can cause the door to hang improperly, leading to problems with alignment and functionality.
Step 4: Preparing the New Door
Before installing the new door, it’s important to make any necessary adjustments to ensure a perfect fit. Start by comparing the new door to the old one. If the new door is slightly larger, use a saw to trim the edges to the correct size. Sand the cut edges to create a smooth surface and prevent splinters.

Next, mark the locations for the hinges on the new door. Align the new door with the old one and use a pencil to trace the hinge placements. Use a chisel to carve out hinge mortises at the marked locations. This step requires precision to ensure the hinges sit flush with the door surface.
If the new door doesn’t have pre-drilled holes for the doorknob and lockset, you’ll need to create them. Follow the manufacturer’s template and use a drill to make accurate holes. Taking your time with this step will ensure that the hardware is installed correctly and functions smoothly.
Step 5: How to Hang the New Interior Door
Installing the new door involves attaching the hinges, securing the door to the frame, and ensuring proper alignment. Begin by screwing the hinges into the door at the marked locations. Once the hinges are attached, position the door in the frame and align the hinges with the frame’s mortises. Secure the hinges to the frame using screws, starting with the top hinge to maintain alignment.

After the hinges are secured, test the door to ensure it opens and closes smoothly. If the door sticks or doesn’t close properly, make adjustments by tightening or loosening the hinge screws. In some cases, you may need to shave a small amount off the door’s edges to achieve a perfect fit.
Step 6: How to Add Hardware to Interior Doors
Adding hardware to the door is the next step. Begin by installing the doorknob, lockset, or handle. Follow the manufacturer’s instructions carefully, ensuring that the hardware is aligned and functions smoothly. Use a screwdriver or drill to secure the hardware components in place. For enhanced aesthetics and functionality, consider upgrading to modern hardware designs, such as sleek levers or smart locks.

Additionally, check the alignment of the latch and strike plate. The latch should easily fit into the strike plate without resistance. Adjust the plate as needed by loosening its screws and shifting it slightly until it aligns perfectly with the latch.
Step 7: Adding the Finishing Touches
With the new door installed, it’s time to focus on the finishing touches. Use shims to fill any gaps between the door and the frame, creating a snug and secure fit. Trim any excess shim material and secure them in place with screws or nails.

If the door or frame has visible gaps, consider adding weather stripping or a door sweep. These additions can improve insulation, reduce drafts, and enhance soundproofing. If you’ve trimmed the door or made adjustments, apply paint or stain to the exposed areas to protect the wood and maintain a polished appearance.
Finally, clean the door and surrounding area to remove dust, debris, or fingerprints from the installation process. Step back and admire your work—you’ve successfully replaced an interior door and transformed the space.
A 12-Step Guide to Replacing an Interior Door
- Gather all necessary tools and materials.
- Measure the existing door and frame accurately.
- Choose the right door (pre-hung or slab) and style.
- Remove the old door carefully by detaching the hinges.
- Inspect and repair the door frame if necessary.
- Prepare the new door by trimming and sanding as needed.
- Mark and carve out hinge mortises on the new door.
- Drill holes for hardware if not pre-drilled.
- Attach hinges to the new door.
- Hang the door by securing the hinges to the frame.
- Install doorknobs, locksets, or handles.
- Add finishing touches like paint, shims, or weather stripping.
Avoiding Common Mistakes
Replacing an interior door can be straightforward, but common mistakes can complicate the process. Here are a few things to watch out for:
- Incorrect Measurements: Double-check your measurements to avoid purchasing a door that doesn’t fit.
- Skipping Frame Inspection: A damaged frame can lead to improper door function, so always inspect it thoroughly.
- Rushing the Installation: Aligning hinges and drilling holes requires patience and precision to avoid misalignment.
- Painting After Installation: Painting or staining before installation can save time and prevent messes.
When to Seek Professional Help
While replacing an interior door is a DIY-friendly project, there are situations where professional assistance may be necessary. If the door frame is severely damaged or requires structural modifications, hiring a professional ensures the job is done correctly. Similarly, if you’re installing custom or specialty doors, professional expertise can help navigate unique challenges.
Conclusion
Replacing an interior door is a rewarding project that combines practicality and style. By following this comprehensive guide, you can achieve a professional-looking result and enhance your home’s functionality and aesthetics. Whether you’re upgrading to modern designs, improving soundproofing, or addressing wear and tear, a new door can significantly elevate your living space.
Explore our extensive inventory of over 2,000 interior doors to find the perfect match for your home. From classic designs to contemporary styles, we offer options to suit every preference and budget. Contact us today to start your next home improvement project.